Archive | Entertaining RSS feed for this section

Blood and Guts Stuffed Eggplant aka Imam Bayıldı

25 Oct

For most people, Halloween is synonymous with sugary indulgence. From handfuls of candy to haunted cakes, most people completely abandon their ideas about healthy eating. The very mention of vegetables on this sinfully sweet holiday is almost unheard of.

Spooky sweets shouldn’t get to have all the fun. With a plethora of shapes, textures, and colors, vegetables have wonderful potential to get a Halloween make over as well. This dish will make a wonderfully unexpected addition to any Halloween party spread. Plus the savory vegetables will help balance whatever sweets you are sure to consume as the evening progresses.

These eggplants have garlic to ward off any vampires (if that isn’t your intent for the evening, be sure to grab a stick of gum or some handful junior mints) while the onions make surprisingly convincing guts and the tomatoes give the appearance of blood.

This is a traditional Turkish dish that is perfect for any occasion, spooky intentions aside. It is perfectly salty and spicy and fresh all at once. Add some beans or beef crumbles into the filling and you have a complete meal.

I used fresh basil, thyme, and oregano in this dish because here in sunny California, my herb plants are still thriving, but feel free to substitute dried herbs or use different herbs altogether depending on what you have access to.

Blood and Guts Stuffed Eggplant 

Adapted from The Shiksa in the Kitchen

Serves 5-6

Ingredients:

  • 5-6 long, purple Chinese or Japanese eggplants (leave the ends in tact, don’t remove the stems)
  • 5-6 tablespoons olive oil, divided
  • 12 large, whole cloves of garlic, peeled and sliced latitudinally
  • 1 large onion sliced into very thin, half-moon style slices
  • 1 Bell Pepper
  • 1 spicy pepper (like Fresno Pepper or Anaheim Pepper)
  • 2 large tomatoes, finely diced
  • 1/2 cup basil leaves, julienned
  • 1/3 cup oregano leaves
  • 2 tablespoons thyme
  • 1/2 tsp kosher salt
  • 1/4 tsp ground black pepper
  • 1 large tomato, grated (optional)

Directions

  1. Preheat oven to 350 degrees Fahrenheit.
  2. Peel the eggplants in stripes, leaving about half of the purple skin on the eggplant. Generously salt the exterior of the eggplant to make it less bitter, and set aside for 45 min (don’t worry, you’ll wash it off later).
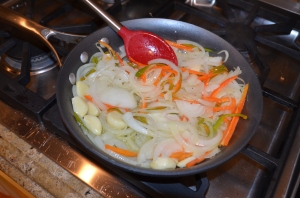
  3. Heat 3 tablespoons of olive oil on medium-high heat in a deep sauté pan. Add onions, garlic, and peppers. Stir frequently to prevent browning. Continue to sauté the vegetables until the onions become transparent. Stir frequently to prevent browning of onions and garlic.
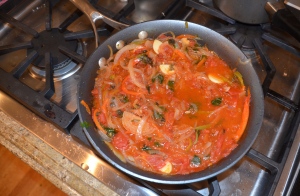
  4. After onions are cooked, add the finely diced tomatoes, basil, oregano, thyme, salt, and pepper  into the sauté pan. Cook for another 5 minutes. Remove the vegetable mixture from heat and allow it to cool.
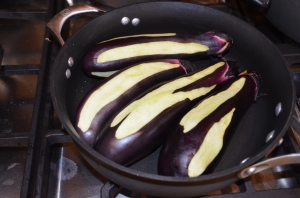
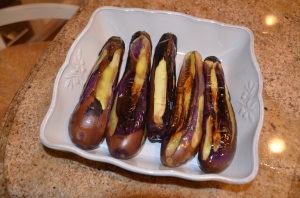
  5. Wash the eggplants, dry. Heat the remaining 2-3 tablespoons of olive oil in a pan (preferably nonstick, if not you may need to add more oil), and lightly brown the eggplants on each side for 1-2 minutes. Set the eggplants in a baking dish to cool.
  6. Cut an opening slit through the middle of each eggplant, being careful not to cut all the way through the eggplant. Use your fingers to expand the opening slightly, so that there is a little pocket in the middle of the eggplant.
  7. Stuff the pockets of the eggplants with the tomato-onion filling, equally divide the filling among the five eggplants. Season with a little more salt and pepper to taste.
  8. Top the eggplants with the grated tomato into the baking pan,if desired. Cover the pan with aluminum foil, then make several slits on the foil to let the steam escape while baking.
  9. Bake the eggplants for 45 minutes or until the eggplants are soft and fully cooked.

Fell free to dress up your eggplants with any spooky props from the party store. Fake bugs could be a fun added touch!


Halloween Round Up

18 Oct

Ever since I was little, Halloween has been one of my favorite holidays because I viewed it as the wonderful day of the year when you get to dress up and get free candy. Over the years, however, I have come to love Halloween in large part because it marks the beginning of the holiday season. Halloween is the first of many festive celebrations with exciting traditions,delicious food, and spirited decor. So here is the first of many holiday round ups to come in the next few months.

Costumes

Baby Frida Costume DIY

Raggedy Anne Costume DIY for kids and adults

Too Big Alice in Wonderland Costume

Children’s Breakfast at Tiffany’s costume on Etsy

Decorations


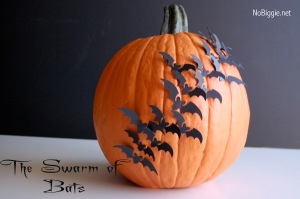
Swarm of Batts Pupkin..since you don’t need to carve it, feel free to decorate this pumpkin in advance, or even do this to a sugar pumpkin so that you can bake tasty treats from the pumpkin after Halloween

Googly-eyed monster cups to make any drink more exciting

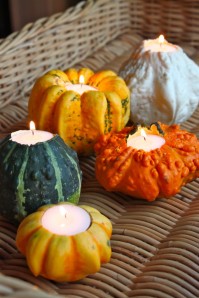
Tea light squashes for a more elegant take on the classic Jack-O-Lantern

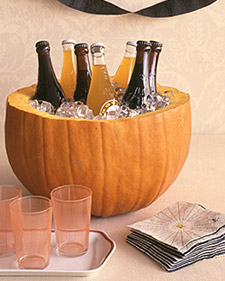
Festive pumpkin cooler

Adorable free Halloween Bunting Printable

Pumpkin Cat…too cute not to include, but please do not try this at home!

Savories

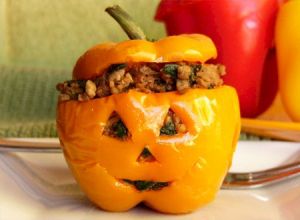
Jack-O-Lantern Stuffed Bell Pepper

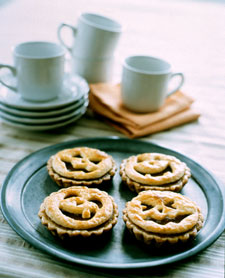
These Jack-O-Lantern tarts have a sweet filling, but with a spanikopita-style spinach filling they’d be absolutely divine!

Spiced Tofu Bruchetes….stick the skewers into a pumpkin for a festive update

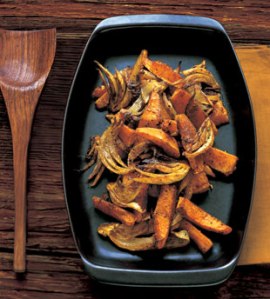
Spiced Harvest Squash and Fennel

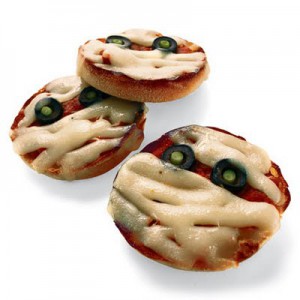
Mini Mummy Pizzas….so much cuter than the giant ones from the pizza parlor!

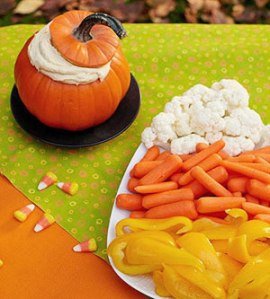
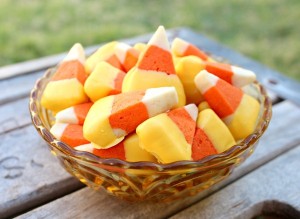
Candy Corn Crudite Platter with Pumpkin Dip for a healthy take the on the beloved candy

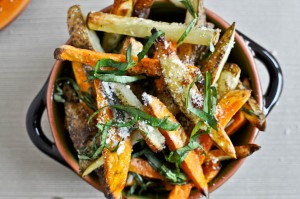
Baked Parmesan and Sage Truffle Fries

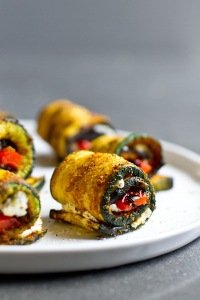
Curried Zucchini Roll Ups

Vegetarian Lasagna Bites

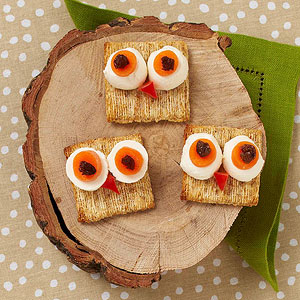
Innocent (or spooky) Owl Crackers

Sweets

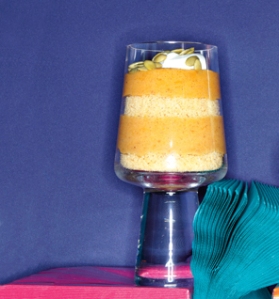
Pumpkin Mouse Trifle (you don’t have to tall anyone that it’s healthy)

Candy Corn Butter Cookies

Pumpkin Cinnamon Rolls with Caramel Frosting

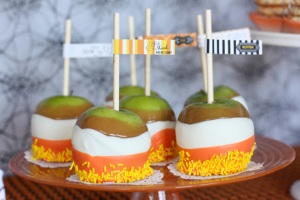
Candy Corn Candy Apples

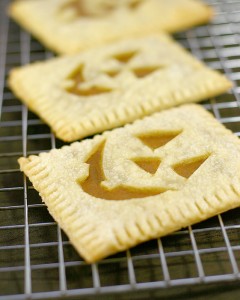
Jack-O-Lantern Pop Tarts

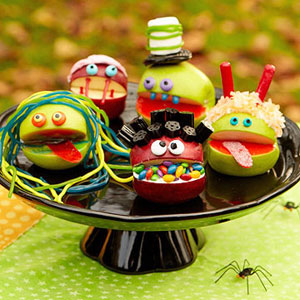
Monster Candy Apples

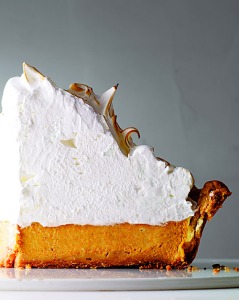
Pumpkin Meringue Pie

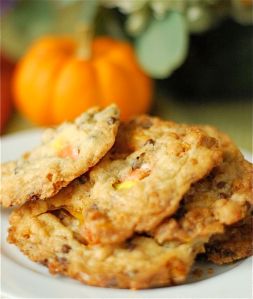
Momofuku Milk Bar Remix: Candy Corn Chocolate Chip Cornflake Cookies

In my family, what began as a simple pizza dinner with friends before trick-or-treating has evolved into a fanciful feast with creative, themed treats and appetizers. It’s a wonderful time to chat with friends and family in a more relaxed setting before the candy-crazed kids begin their neighborhood roam. What are your Halloween traditions?

September Likes

27 Sep

10. Check out this wonderful list of 7 trips every woman should take in her lifetime over at The Frisky. As if anyone needed another reason to travel! While a trip may not be in your immediate plan, it’s still a good idea to keep this article in the back of your mind for the next time you’re on the hedge about leaving town.

9. I love this super-sweet heart braid featured on Cup of Jo. It is pretty enough to make any little girl jump with joy, and funky enough to dress up a basic sweater-and-jeans ensemble. No matter who wears this awesome hairstyle, it’s bound to get smiles all around.

8. Check out this incredible DIY pallet bed from Prudent Baby. I can’t believe some of the resourceful recycled DIYs that people come up with! It’s beautiful, it’s eco-friendly, and it costs practically nothing to make! Make it your own with whatever colors and prints inspire you. Besides, nothing will blow your friends’ minds like hearing that you made your own bed.

7. Check out these adorable collard-wrapped mini burritos over at The Daily Meal. They are packed with quinoa, beans, cheese, and veggies. The vibrant color and wonderful size make these a healthy and exciting appetizer for a party or special dish for a Meatless Monday family dinner. Get creative with the fillings and use whatever you like best. I guarantee it will end up costing far less than any commercial fast food burritos and it will be far more nutritious too!

6. For anyone looking to ward off a few pounds prior to donning revealing Halloween costumes or simply looking to avoid the dreaded Freshman 15, check out Slimkicker. The online database and iPhone ap turn health and fitness into a game. Upon accumulating enough points from completing your self-chosen challenges and chronicling your meals and exercise regime, you earn points to advance to the next level, at which time you treat yourself to whatever reward you chose. I love the idea of turning health into a game where you choose how hard you want to push yourself and you set your own goals.

5. All of the nail designs over at nail-fun.tumblr.com are pretty amazing, but these Cath-Kitson inspired floral nails may be my very favorite. The bright blue base and delicate rosettes are enough to make anyone smile when they look down at these nails. I doubt I could ever master the complicated designs on this site, but they certainly provide some great inspiration for the next trip to the nail salon.

4. I can’t get over how adorable this travel-inspired dessert buffet is over at Amy Atlas Events. The sweet map cut outs, vintage suitcases, fluffy meringue clouds, and pretty little hot air balloons make this such a creative update on the typical dessert bar. This seems like the perfect addition to an UP themed wedding to me!

3. I am so excited by this super-simple yoga mat cleaner DIY from Free People’s BLDG 25 Blog. It simply fills a spray bottle with 3 parts water with 1 part Witch Hazel and a few drops of essential oils with antibacterial properties such as tea tree, lemongrass, lavender, peppermint, or eucalyptus. I can’t wait to make it this weekend because my yoga mat doesn’t quite smell like roses…

2. This Ostrich Pillow on Kickstarter allows users to take a comfy power nap anywhere. I love that idea of the creators to design a product that “allow[s] you to create a little private space within a public one, to relax and unwind.” It allows you to bury your head and hands into the soft cushiony folds in order to catch some zzz’s on the go. The architecture firm who designed the product has met its goal with still 20 days to go.

1. This Decorated Cake Roll from Sugar For the Brain is absolutely awe-inspiring. Making any type of cake roll is pretty intimidating, but this beautifully printed cake seems terrifying to make. If you have the guts to try it, I can think of no better way to impress someone on their birthday. Sorry mom, I am not brave enough to make this for you next week…at least not yet. PS check out her Halloween Cake Roll on Best Friends for Frosting too!

Festive Summer Fruit Basket

22 Jul

I always count down the days until my favorite summer fruits starts to flood the farmer’s market stands. Oranges and apples are nice, but nothing can beat the taste of a ripe mid-summer peach or a juicy pint of strawberries. They are delicious in compotes, pies, jams, or tarts but I think that they are best eaten plain.

So often people feel entitled (myself far too often included) to a sugar-packed treat after dinner or even after lunch. However, when fresh fruits are so sweet and delectable, there’s no need to turn to goodies with added sugar because fruit tastes even better. Fruit takes less time to prepare, is far healthier, tastes better, and can be even prettier than any baked treat.

The next time you’re entertaining and need a fun way to end the meal, give this fruity basket a try. Its cute presentation will thrill kids and adults alike!

Summer Fruit Watermelon Basket 

Adapted from the National Watermelon Promotion Board

Materials:

  • 1 pint of blueberries
  • 1 pint of raspberries
  • 1 pint of strawberries
  • 1 large seedless watermelon
  • Cutting board
  • Kitchen and paring knives
  • Nontoxic green dry erase marker
  • thin rope or ribbon
  • Large bowl and spoon
  • Melon baller
  • cookie cutters in hearts, stars, and other fun shapes

Directions:

  1. Rinse strawberries, blueberries, and raspberries. Cut the strawberries in half and set all berries aside.
  2. Wash watermelon and pat dry.
  3. Place the watermelon on its side and cut off the bottom  1/4 to 1/2 inch so it can stand up flat.  Make sure not to cut too deep into the white part of the rind so that the liquid doesn’t leak from bottom of the melon.
  4. Stand the watermelon on its cut end then use the dry erase marker to draw a line about 1/3 of the way down from the top, around the whole watermelon. Use the rope or ribbon to make sure that you make a smooth line going around the melon.
  5. Pick a point on the line and find the corresponding point on the exact opposite side of the watermelon. From those points measure 1 inch to the right and to the left. Connect those points by using the rope to draw two parallel lines across the top forming the handle.
  6. Use the paring knife to cut along the horizontal line and two vertical lines. Go very slowly with gentle force so as not to break or crack handle. For best results, hold paring knife like a pen, but only cut half way into rind. Once you complete that first cut all the way around, go back and cut the rest of the way through the rind. Doing the cut in two steps will ensure a cleaner line and smoother cuts.
  7. Make a cut around the inside perimeter and carefully remove the trimmed rind and flesh. Try to remove as much as possible in large portions that can later be sliced and used with the cookie cutters.
  8. Scoop out remaining flesh from base, trying to leave as much flesh intact. Remove it in larger pieces that can be used for making watermelon balls or bite-sized chunks.
  9. Using cookie cutters, cut shapes from watermelon. Se the shapes aside on a paper towel to drain.
  10. Use the melon baller to scoop out balls of watermelon.
  11. Then use a large spoon to remove any unsalvageable watermelon and puree it and mix it with lemonade or freeze it to make popsicles.
  12. Start filling the carved out melon with a mixture of watermelon and berries from the first step. Make sure to save the fruit cut outs for the top of the melon.
  13. Arrange any remaining fruit around the perimeter of the melon.
  14. Optional: Use a shovel or cake mix sand to create a beachy vibe.

Four Bite Sized Desserts for the Fourth

4 Jul

Fourth of July is one of the most beloved American holidays because not only does it celebrate America’s hard-won freedom, it also gives Americans a great deal of freedom as to how they want to celebrate. While a BBQ and fireworks are traditional, there is no necessity to do anything other than have a good time. You don’t have to buy gifts, spend lots of money, or go through the stress of planning the perfect holiday meal. Fireworks are free, the beach is open to everyone, and barbecuing is way easier than planning a sit-down dinner party. The Fourth of July is an excuse simply to hang out and have a good time.

And what could be a better complement to your BBQ than a few homemade American desserts. Instead of getting super elaborate with the sweets, keep it easy with rice krispies, lemon bars, s’mores, or brownies. In bite-sized squares, these treats are easy to pick up and nibble on at any point of your 4th of July celebration.

I chose to update these American classics a bit with Browned Butter Rice Krispy Treats, Light and Tangy Lemon Bars, S’mores Cups, and Chewy, Chocolate-Studded Brownies. When I made these desserts for a casual get-together with friends a few weeks ago, the s’mores bites and lemon bars were both HUGE hits.

Just a secret between you and me…these desserts are all a bit healthier than most treats, so you can indulge without feeling guilty. These desserts each take less than an hour to whip up, so make all four or just stick with one of two.

This year we are having a BBQ and outdoor screening of Independence Day for some of our friends and just keeping it simple and relaxed. What are you doing to celebrate?

Browned Butter Rice Krispy Treats

Adapted from Krissy’s Creations

Serves 16 (to make 24 treats, I  made mine in a 9 by 13 inch pan and multiplied all ingredients by 1.5)

Ingredients

  • 5 tablespoons unsalted butter
  • 3/8 teaspoon salt
  • 1 bag of large marshmallows
  • 1 tablespoon vanilla bean paste (or vanilla bean extract)
  • 5 cups Rice Krispies cereal
 Directions
  1. Butter the bottom of a 9×9 baking pan and set aside.
  2. In a small saucepan, melt the butter over medium-low heat.  Continue to cook until the butter has turned a golden brown color, about 7 minutes.
  3. Place a mesh strainer over a large saucepan and pour the browned butter through the strainer to remove any little black dots (the slightly burned pieces). Place the large saucepan over low heat and add the marshmallows and salt.  Stir occasionally until the marshmallows are completely melted and smooth, then mix in the vanilla. Make sure not to keep the marshmallow mixture over the heat for too long otherwise your rice krispy treats will turn out hard and crunchy instead of soft and chewy.
  4. Add the cereal to the marshmallows and stir until the cereal is completely coated with the melted marshmallows.Remove from the heat and stir a few more times to make sure the cereal is evenly coated.
  5. Pour the mixture into the prepared pan. Let it cool slightly for 2-3 minutes, then use a rubber spatula to press it down into the pan.
  6. Let the treats cool in the pan on counter until completely cooled and hardened, about 2 hours.  Do not refrigerate them in an attempt to speed up the cooling process, as this too will make your rice krispies undesirably hard.
  7. Cut into 16 squares, and serve!

Light and Tangy Lemon Bars

Adapted from Shape Magazine

Serves 16

Ingredients

Crust

  • 1/2 cup almond meal
  • 1/2 cup white whole wheat flour
  • 1/4 cup powdered sugar
  • 1/4 teaspoon salt
  • 4 tablespoons unsalted butter, cut into 8 chunks

Filling

  • 3/4 cup granulated sugar
  • 1/4 cup  all-purpose flour
  • 1/4 teaspoon salt
  • 3 lemons
  • 1 lime
  • 2 large eggs, lightly beaten
  • Additional powdered sugar for garnish

Directions

  1. Preheat oven to 325°F and lightly coat an 8-inch square baking dish with cooking spray.
  2. To make the shortbread, in the bowl of a mixmaster, mix the almond meal, flour, powdered sugar, and salt. Add butter and beat until no large chunks remain and mixture is loose and sandy.
  3. Transfer to baking dish and press firmly into base and edges until even. Bake for 22 to 24 minutes or until edges are golden brown.
  4. Meanwhile, make the filling by combining sugar, flour, and salt in a large bowl. Finely zest lemons (about 2 teaspoons) and one lime (about 1 teaspoon) into bowl. Squeeze 1/3 cup juice from lemons and 1/4 cup juice two tablespoons from two limes and add to bowl along with eggs; whisk until smooth.
  5. Pour the filling over crust and return the dish to oven and bake for 30 to 32 minutes or until center is set.
  6. Cool completely on a wire rack.
  7. Just before serving, cut the squares into 16 squares and sift powdered sugar over squares to garnish

S’mores Cups

Adapted from The Pampered Chef

Serves 24

Ingredients:

  • 8 graham crackers
  • 1/4 cup powdered sugar
  • 6 tablespoons butter, melted
  • 4 bars of chocolate, milk or dark
  • 12 large marshmallows (or 24 if you like very marshmallow filled s’mores)
  • Nonstick cooking spray

Directions:

  1. Preheat oven to 350°F.
  2. Place the graham crackers in a large plastic bag, and use a rolling pin to finely crush them.
  3. Using a spoon, combine the graham cracker crumbs, powdered sugar and butter in a medium sized bowl.
  4. Spray a 24-cup mini muffin tin. Then evenly distribute the crumb mixture among the cups, placing about a tablespoon in each tin.
  5. Use your fingers to press crumbs to form shallow cups. Bake the graham cracker crust for 4-5 minutes, or until edges are bubbling.
  6. Meanwhile, break the candy bars into 48 rectangles. Remove the pan from oven; place one rectangle into each cup.
  7. Cut marshmallows in half  crosswise (or use whole marshmallows if you like your s’mores really gooey) using kitchen shears. Place one marshmallow half, cut-side down, into each cup. Return to oven 2-4 minutes depending upon how toasted you like your marshmallows.
  8. Remove the pan from the oven and press the chocolate pieces into the top of each marshmallow and return for them to the oven for another 1-2 minutes so that the chocolate can start to soften a bit.

Chewy, Chocolate-Studded Brownies 

Adapted from First Look, Then Cook

Serves 16

Ingredients

  • ¾ cup all-purpose flour
  • 3/4 cup unsweetened cocoa
  • 1/2 teaspoon baking powder
  • 1/4 teaspoon salt
  • 1 1/2 cup bittersweet chocolate chips, divided
  • 6 tablespoons butter, melted
  • 3/4 cup granulated sugar
  • 1/3 cup brown sugar, packed
  • 1/3 cup skim milk
  • 1 teaspoon vanilla extract
  • 2 large eggs, room temperature, lightly beaten
  • Cooking spray

Directions

  1. Preheat oven to 350°. Spray a 9 inch square baking pan with cooking spray and set aside.
  2. Lightly spoon flour into dry measuring cups and level with a straight edge. Whisk together flour, cocoa powder, baking powder, and salt in a large bowl.
  3. Combine 1/2 cup chocolate chips and butter in the bowl of a double boiler until melted. Remove chocolate from the heat and allow it to cool for 2-3 minutes.
  4. Stir in milk, sugar, vanilla extract, and eggs into the chocolate mixture until combined.
  5. Add the chocolate mixture to the flour mixture and stir until just combined. Gently fold in the remaining cup of chocolate chips.
  6. Pour the batter into the prepared pan and bake for 18-20 minutes, or until a tooth pick inserted into the brownies comes out almost clean.
  7. Allow the brownies to cool over e baking rack then cut into 16 squares.